So this is where the 3 inlet rubbers were sitting, still on the old head!:
and this is the radiator bottom mount bracket that I couldn’t find (and is labeled as an air pump bracket on the parts diagram):

I went up to the workshop tonight and installed the inlet rubbers onto the engine:
Installed the radiator bracket and test fitted the radiator:


all looked pretty good! I then removed the radiator and put it aside. Then I dug out the top plastic piece that fits to the frame above the radiator:


Then I fitted the rubber sheet to the top of the engine and installed the stick coil packs:

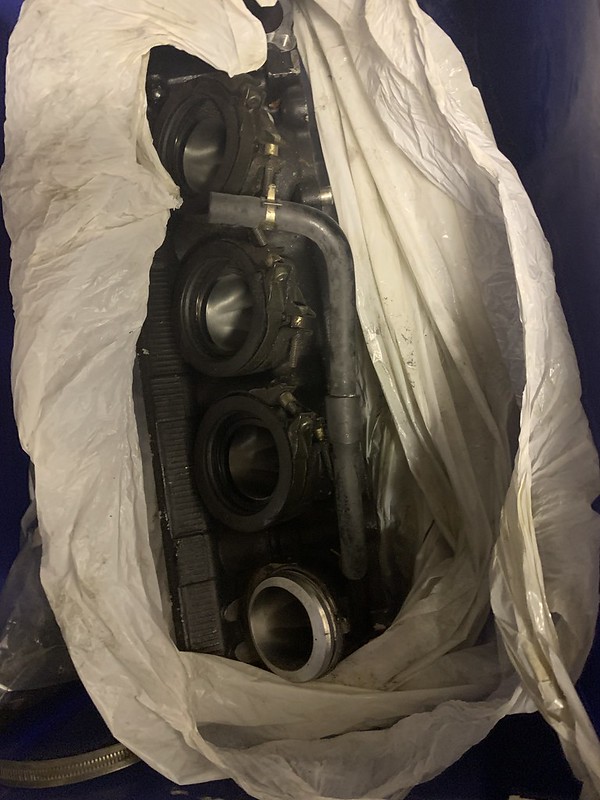
at this point I wanted to fit the throttle bodies into the inlet rubbers but it was quite cold outside and the rubber wasn’t very pliable. I didn’t have a hair dryer or a heat gun up at the workshop so I couldn’t warm them up so I put the throttle bodies to one side again. I then found the radiator guard and installed that on the radiator:

Jobs left to do before I can test fire it with some easy start are: – Fit throttle bodies – Plumb up cooling system – Connect all the wiring – Oil soak clutch plates and install – Install Barnett clutch spring conversion – Fit oil filter – Fill with running in oil – Fit left hand rearset to ensure box is in neutral Then I can spray some easy start down the TB’s and see if it fires! If it does then I can fit the airbox, fuel lines, pump into the tank, connect it up, fit the throttle cables and see if it runs properly! The next day I popped down the workshop again to get a bit more done! First thing, I wanted to deal with the wiring loom. There used to be tie down points on the inside of the frame, but they were made of rubber and had to be removed for the powder coating. I didn’t want to leave the wiring loom just floating around to rub on things so I thought I’d feed a cable tie down through the holes. Easy, right? Well it would seem not. The rubber fixing points are actually attached to large rubber blocks inside the frame. I had to use a small craft knife to cut enough of a pathway to feed the cable tie through, and then I closed the loop and attached another cable tie to affix the loom to the frame:

The problem I’d had yesterday seating the throttle bodies was mainly due to the inlet rubbers being quite cold in the workshop, and them having been off of the bike for so long. I whipped out the heat gun and warmed up the rubber boots until they were more pliable:

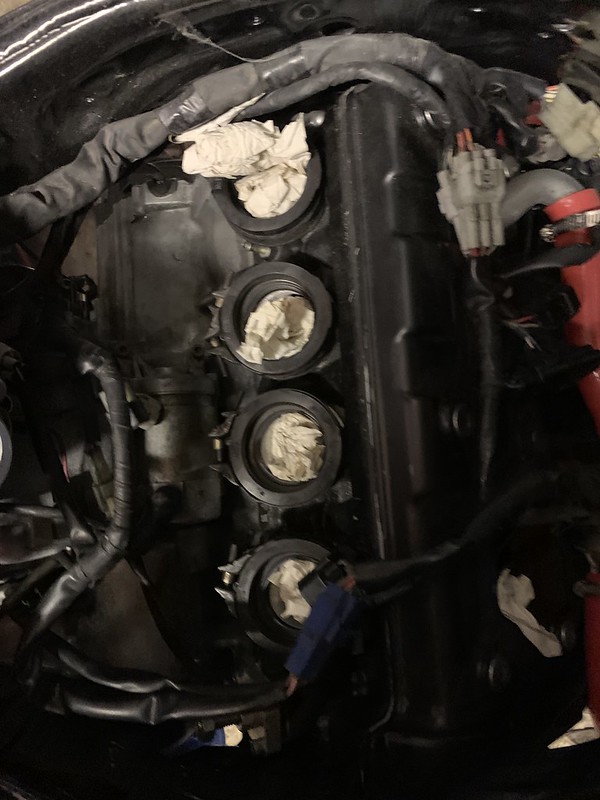
And then with a lot of wiggling and some percussive persuasion I got the throttle bodies fitted and the clamps tightened up:


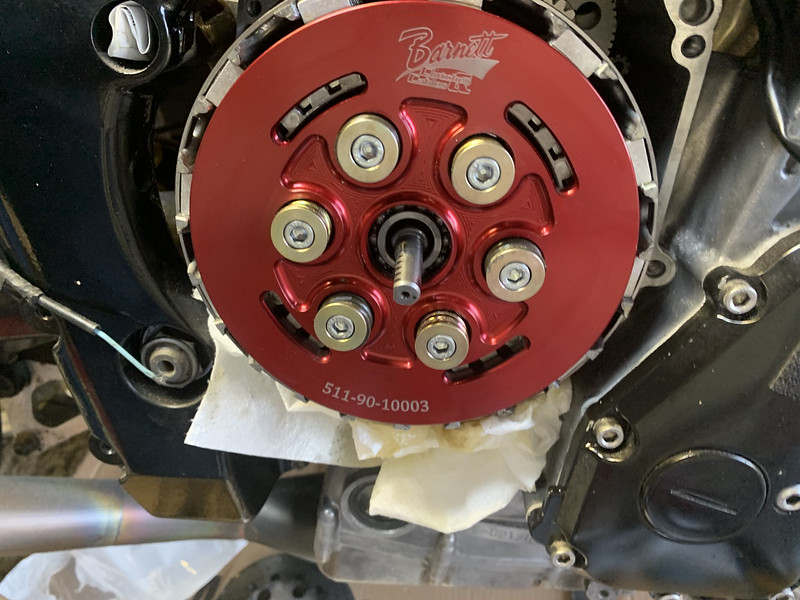
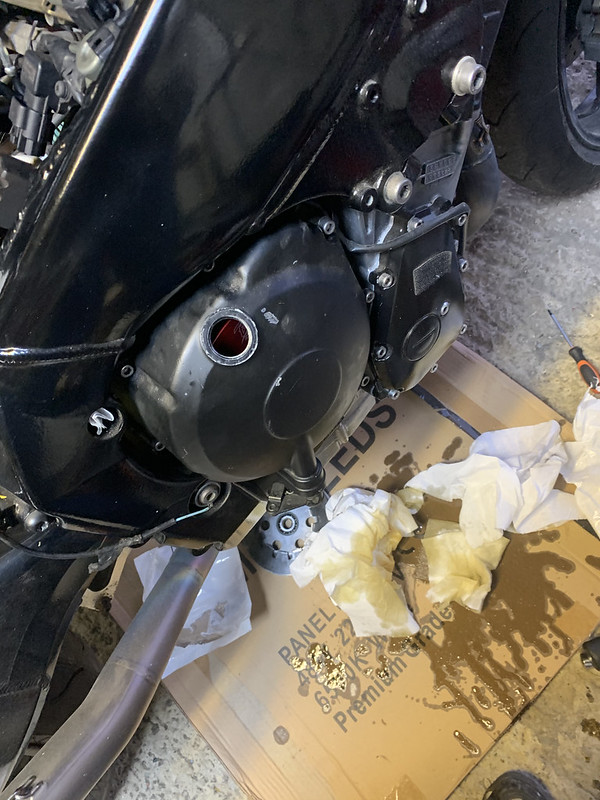
I was going to sort out the rest of the wiring connections, but I got hungry and went home. The next day I set out again, I’m just doing an hour or two an evening when I get a chance. Decided I’d fit the clutch. The clutch pull rod in the casing on this engine didn’t have the lever attached to the bottom, so I salvaged the whole rod out of the old casing and fitted that. I then had to torque up the clutch hub nut. The nut is 30mm but my only 30mm socket is 3/4″ drive, and my torque wrench is 1/2″ drive. Happily one of my friends was up in his workshop and he had a 1/2″ drive 30mm socket. I locked the clutch with the special R1 clutch locking tool I bought a few years ago and torqued up the nut to spec. Then I set about soaking the new Barnett carbon clutch plates in fresh oil:

and then I started installing them:

and fitted the Barnett spring clutch conversion plate:


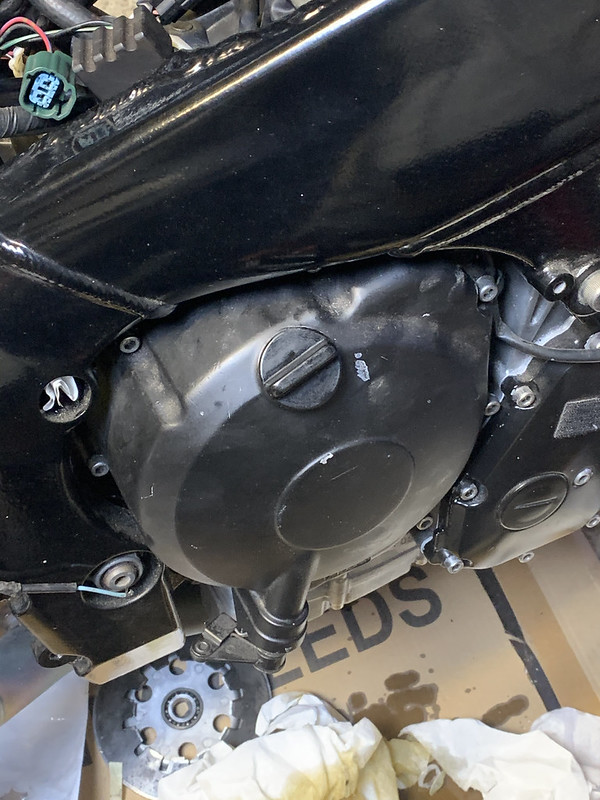
Then I fitted a fresh gasket and put the casing on:
Fitted an oil filter:

Filled the engine with 3L of oil and fitted the oil cap!
It’s starting to look more like a bike day by day (excuse the state of the workshop, I’m currently trying to sort it all out and tidy up, but its been made a lot messier in the process!). Bonus points for anybody who can guess what car is in the background…