So, with my neighbours tap in hand and a borrowed tap kit from my father (which also included an M6x1.00 tap), we (my father and I) set off back to the workshop.
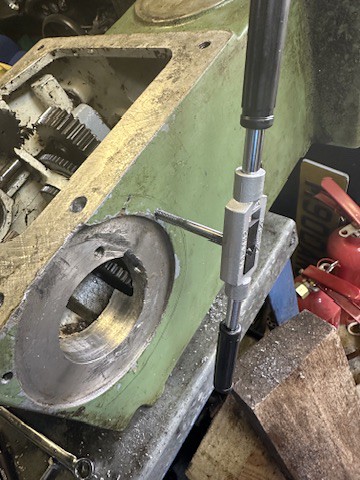
Problem one was that the gearbox has handles on the opposing face to the motor mount, so it won’t lie flat on it’s front, and regardless of that, the box itself wouldn’t fit within the travel of my little pillar drill. I obviously needed the holes to be cut straight, so I made up a quick drilling block on the pillar drill and used that for the guide. I first used a 3mm drill bit, marking and drilling the new mounting ring first, and then marking the gearbox through the hole. I used a punch to create an indentation to locate the drill bit in, and then aligned the quickly made drill block:

I drilled it out 3mm first, and then 5mm as required for an M6 tap. I then tapped the hole:

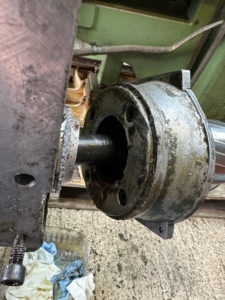
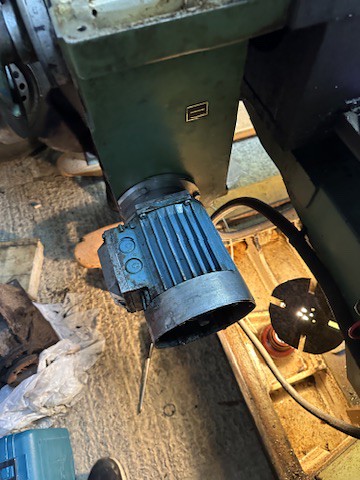
and test fitted with the motor nose attached to the mount:

I then repeated the process with hole 2:
all looking good so far:

and finally hole 3 (showing the drill block I made for the 5mm drill bit):

and it all fits up nicely!


So I re-assembled the motor and fixed on the mount:


re-attached the gearbox to the mill:

re-installed the motor drive shaft along with the circlips for the bearing and the shaft end:


I also re-packed the front bearing and re-installed the cover plate. I then put gasket sealant on the mating face of the mount and the nose engagement piece to create an oil seal, fitted the woodruff key into the shaft, and installed the motor!


I then added gasket sealant to the surface of the gearbox cover plate and affixed that:

and with a quick test, it worked!
I then left the RTV overnight to dry before going back today and adding gearbox oil to it. I need to find something to replace the missing oil wicks, I think probably cotton pipe cleaners will work, but I’ll test their wicking qualities this week and see.
Then, finally, I burned the old workshop cabinets in the firepit:


All in all a very successful and decent Easter Bank Holiday! Next step is to replace the connection block on the main top motor & replace the cover, and possibly look at replacing the damaged belt cover, though that’s just cosmetic. Not long until I have a fully working machine I think!