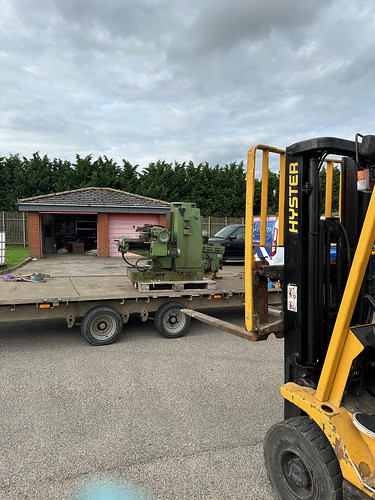
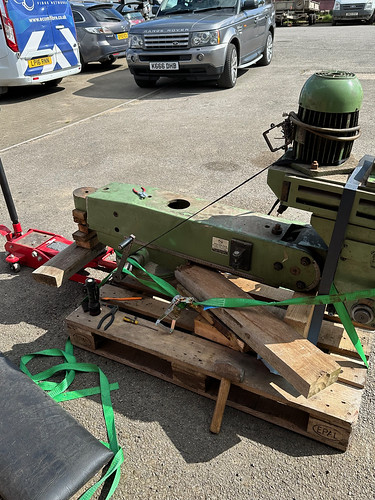
For many years now I’ve lusted after a milling machine of my own, but a combination of space, power, and ease of movement issues compounded into it not happening. That is, until the 6th of July this year when I spotted an advert for a Gate Turret Mill on Facebook Marketplace for just £400. The advert stated that it was located just down the road from me in Berkhampsted, and not much else. These are the advert photos:


I promptly messaged the chap, and over the course of about a week managed to ascertain that it was actually located in Kent. He said that he had a forklift that could lift it to load, and was happy to arrange collection. He had some personal stuff going on so I wasn’t actually able to arrange collection until the end of July, but once I had, a good friend of mine Chris Wilkie who runs https://www.ecomltd.co.uk/ and https://www.creslowpark.com/ (home of my workshop and the IBM 360 project) kindly agreed to give me a hand shifting it.
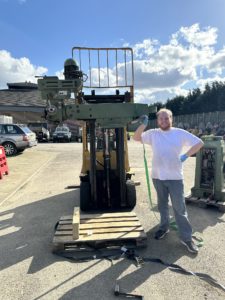
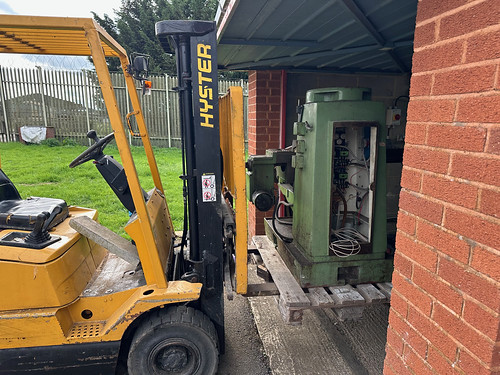
On a Thursday evening we hooked up the trailer and set off for Kent. Once we had arrived at the chaps unit the full scale of this milling machine became clear – it’s a beast! Exactly what I wanted though, which is great. The machine was helpfully already on a pallet, so in theory it should’ve just been a case of hoiking it up with the fork lift and dropping it on the trailer, but of course these things are never that simple! Firstly there was supposed to be a large forklift available, but since the chaps last visit to his yard this one seems to have gone missing and all that could be found was a tiny forklift with a maximum lifting capacity of 1.1 tonnes, and with no operable brakes. This presented an issue as this milling machine weighs about 1.7 tonnes! We tried to lift it, but of course after much hydraulic groaning not a lot happened:

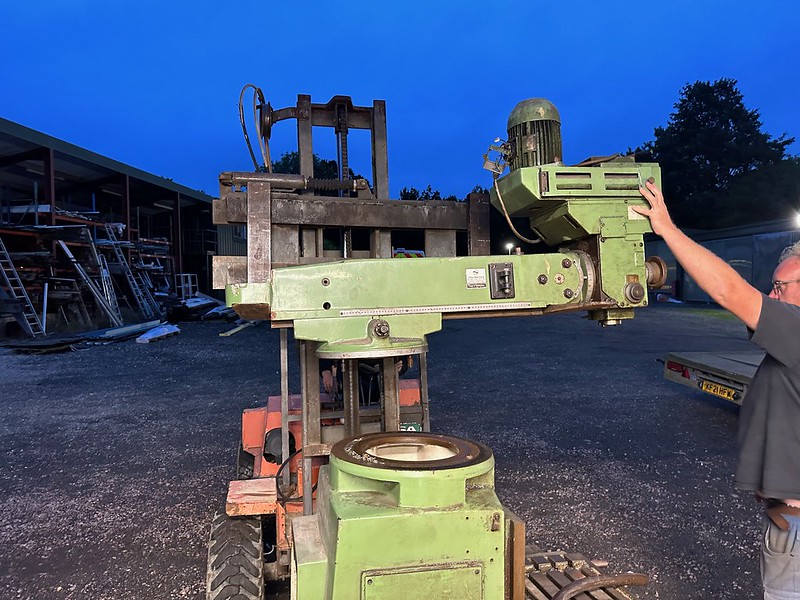
So, in lieu of any other ideas, we decided to split the machine at the swivel. Luckily the forklift was capable of doing this:

Doing this we managed to get the ram & head onto one side of the trailer, and the base unit onto the other side. We got this strapped down and headed off on the long journey back to Creslow. We pulled in to check the straps after a short while just to make sure:

But happily nothing had moved. We arrived back to the yard about 2am, I wrapped the machine up in plastic, and we went home to sleep intending to unload it the next day.
Arriving the next day I found that everything was nice and dry which was great, and we set about unloading stuff from the trailer. The forklift at the yard is much better than the one we used to collect the machine, but it still has it’s issues so we had fun and games unloading again! Happily Chris is a much more experienced forklift pilot than I am so agreed to assist:


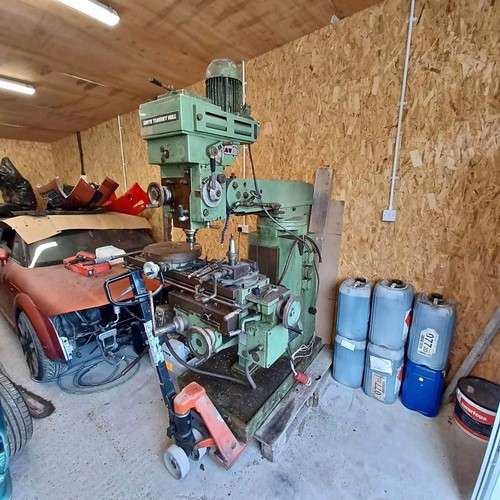
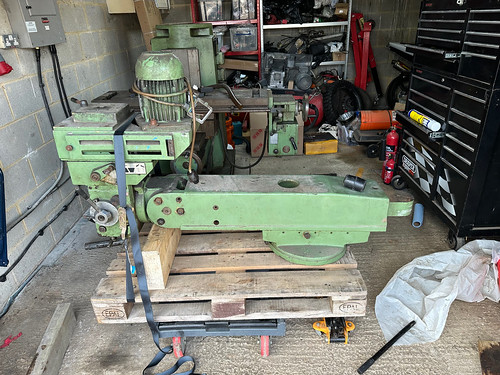
Unfortunately the fork lift is slightly too high to fit into the garage, so once it was at the door we were on our own! We tried initially placing the machine on a trolley we found, but this didn’t look like it was up to the task so we resorted to rolling it in on scaffolding poles:

The ram then went on another little trolley for ease of movement:

I’d balanced it on some old wood for east of dropping it off of the fork lift onto the pallet, but this proved fairly unstable so I sought to adjust this through the strategic placement of some hydraulic jacks:

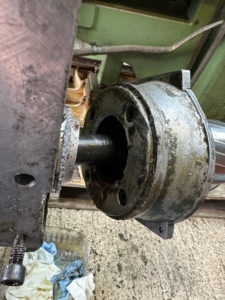
This was, in hindsight, not the safest thing to do, but it did get the job done. Now, when we’d been loading the machine it had become clear that the rams adjustable position from the swivel boss was completely seized. I tried moving the handle etc. but to no avail, so I soaked the thing in a whole can of penetrating oil and left it over night. That evening I took a trip to pick up a used pump truck for £60:

Which I promptly took up the yard the next day. Having this pump truck meant that the sketchy plastic trolly that the ram was on could be retired, but first I had to get the pallet off of it. Back to the fork lift!

And it’s off:

I then turned by attention to the rest of the mill, and found that the suds tray was still full of manky old suds:

This was promptly sucked out with my fathers workshop Vax in liquid mode:
I then turned my attention back to the seized ram. With the ram lifted off of the pallet and the swivel boss in the air I figured I had the best change of freeing it off with the least weight on it. Posting on r/machinists someone suggested that it might be possible that the ram is pinned in place to avoid factory machinists adjusting it. I checked everywhere and found nothing like this. I removed all of the gib bolts and loosened all of the adjusters. The shaft would move slightly and tension the adjustment chain, but the boss wouldn’t move.

I strapped the ram to the pallet such that it couldn’t move and my father and I attempted to use a piece of wood and a sledge hammer to free it off. Still not movement, still no joy. About this time a friend arrived and I went to give him a tour of the site. In the mean time my father carried on with the wood and sledge hammer method, and by the time we’d gotten back he had managed to free it off!
This was great news as freeing this off was looking like it was going to be a nightmare, but it now moves with relative ease and I’m certain once I’ve got some slideway oil on there it’ll be right as rain.
I then set about cleaning the pretty disgusting motor fan on the spindle drive motor:
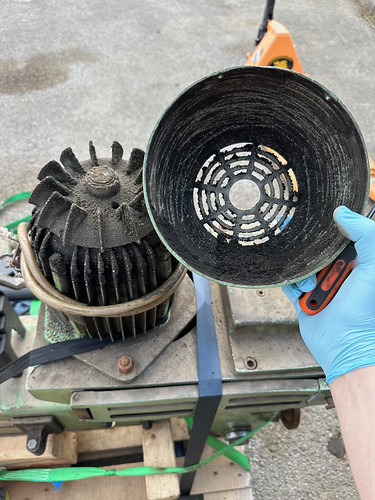


It’s clear that this needs some more cleaning but it’s still quite a bit better than before.
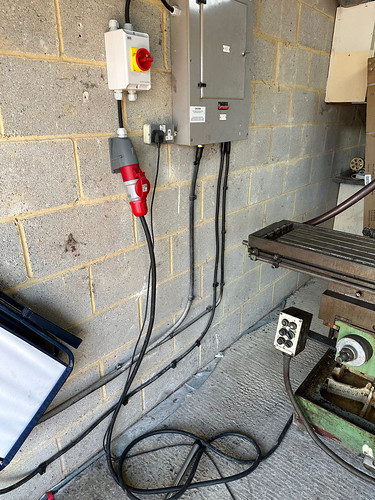
Next up I decided to power up the core of the machine to test the various systems. Obviously the main spindle motor isn’t currently attached (it also has a broken terminal box – more on that later) but the rest of the systems such as the power feed and the suds pump are connected.


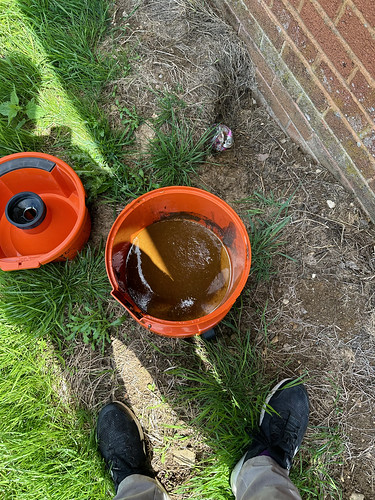
Sure enough the suds pump worked fine, but the power feed motor span a bit and then stopped. I decided to remove the back of the motor to take a look, and as soon as I did liquid oil started pouring out:


Which isn’t really what I expected from an electric motor without sealed end caps. My theory is that this is decomposed grease and the motor needs the bearings re-packing.
The motor being apart revealed nothing obvious other than some very light corrosion on the commutator, so I re-assembled it and tried again. This time the motor span a bit but then stopped again. It then became clear that the issue was likely inside the powerfeed gearbox. I drained the gearbox oil and popped the side casing off:


It looks fairly clear from inside the box that there is a wheel on the motor shaft that is both in the wrong place and extremely worn. It is not immediately clear to me what this wheel is for nor what it should look like. I currently don’t have a parts diagram or manual for this machine so I think in order to fix this I’m going to need those.
We packed up and went home for the day at this point, intending to come back the next day. Unfortunately on Sunday morning my father had to be rushed to hospital so obviously we were unable to make any real further progress on the machine. I did pop up for 20 minutes to take some measurements of a couple of bits. Firstly this switch:

and secondly the broken motor fan from the power feed:

I took these measurements home and drew up replacement parts in Fusion 360:


I then setup the 3D printer (Creality Ender 5 Plus), sliced the models, and set them to print:


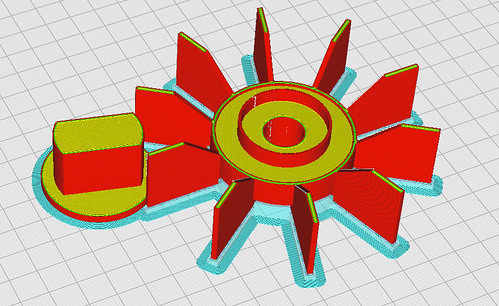


The prints need a little cleaning up but nothing crazy. I noted when I was making a model of the motor fan that the blades were straight and found this odd, but having printed it I now note that it moves very little air. It’s possible that the motor cowling assists in this, but ultimately I think I’ll probably re-design it again to have curved blades to actually move air over the motor housing.
That’s all for now. I’m unlikely to make much further progress until my father is more stable as I’m visiting him most evenings at the moment, but I’m hoping fairly soon I can re-wire the spindle motor, test that, fix the gearbox, put the ram back on the mill and get it into place!