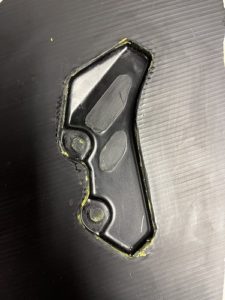
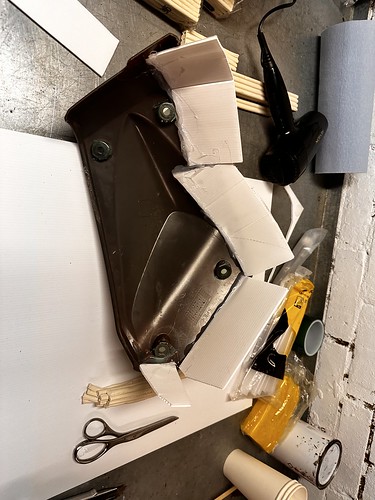
Well, it’s been quite a while since I last posted an update on this! In the mean time time I’ve changed jobs (so I actually spend time at home now!), my girlfriend has moved in, and about 6000 other things have happened. Last week I finally decided it was time, so I headed out the garage to make a new piece of tooling. I’ve wanted to make some replacement plastics for the Tenere for a while as the standard grey plastics they fit a) look bad, b) break, c) cost a fortune to replace, and d) can’t be painted. So, I removed the right hand side pod and set to work! Firstly, the side pod is a really awkward shape. Part of vacuum resin infusion carbon fibre manufacture requires a large external flange to be added to the part such that you can draw the resin through the part and have space for the infusion connectors. If the part is flat you can just put it onto a piece of fluted signboard and filet the edge with wax, job done. For a part like this it’s more complicated, and I had to get creative. Additionally, the part has a mottled surface to it which I don’t want to appear on the final surface, so I’m going to need to leave enough thickness of Gel that I can sand it out. I started by flipping the part over and sticking some flash tape over the screw holes:

I originally tried building up Plasticine underneath the part to create the flange, but this proved too difficult to do, so I resulted to a different method. I cut small pieces of fluted signboard and started sticking them to the bottom of the part with hot glue:
I finished up the additions of the flange pieces and then added flashing tape over the gaps:

I then added filleting wax around the edges to create a positive relief:


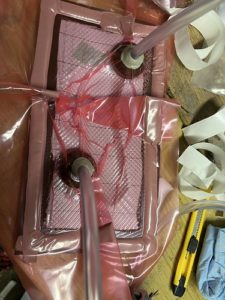
Once that was done, I mixed up the first layer of UG1 Tooling Gelcoat and catalysed it at 2%. I degassed the gelcoat for a couple of minutes in the degassing chamber, and then applied the first later over the part:
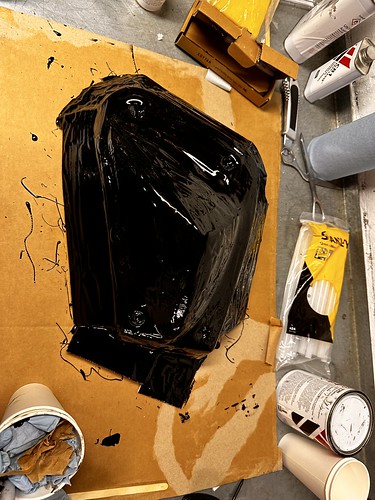


I was a little concerned that quite a lot of gelcoat had gone down into the screw holes, and I wasn’t sure if this would fully cure. I thought worst case scenario I’ll just sand it out. I then set a small heater going as it was about 12 centigrade in the garage and I wanted to raise the temperature for an hour or so to help the gelcoat exotherm:

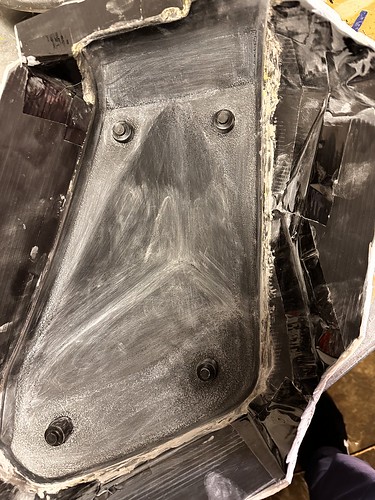
The next day I added a second thick layer of gelcoat to add additional thickness to sand into:

10 hours later, once the gel had cured to a light tack, I added 4 layers of 100gsm matting and coupling coat to the gel coat:
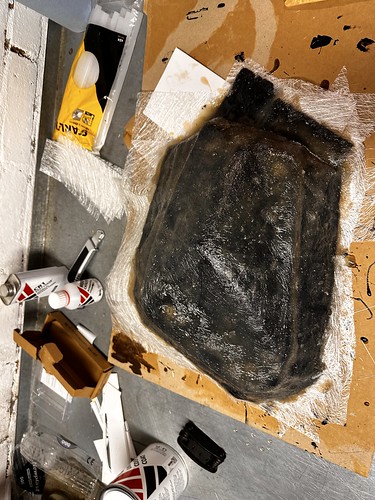

24 hours later it was fully cured and I started adding 4 layers of the tooling resin and thicker 450g emulsion bound chopped strand matt

Another 24 hours went past and that was fully cured:

I flipped the part over and started pulling off the flange material:
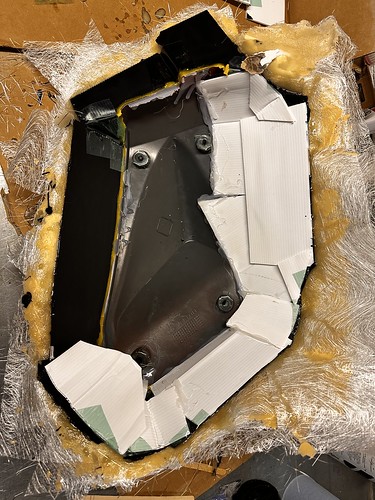
I then started trying to remove the part. Parts are often hard to remove from moulds as obviously the moulds are fitted tightly to the parts, and despite this mould system having minimal shrinkage during exotherm, it still has a little bit. I wanted to be careful not to damage the surface of the mould, but I broke several demoulding tools trying to get this out! In the end I resorted to brute force and ignorance, and eventually it popped right out!

I have to say, there is very little more satisfying than when that works perfectly as planned! Now the part was out of the mould, I set about cutting the mould down to size with the Dremel:

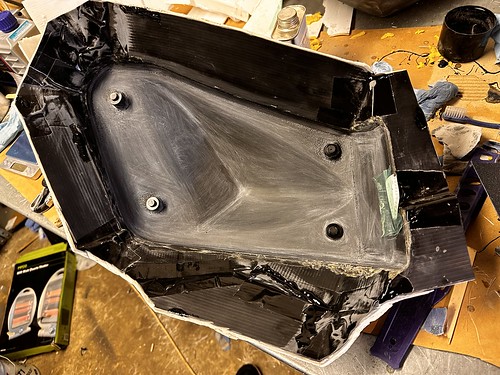
As mentioned earlier, the surface of the part isn’t smooth, and as such neither is the surface of the mould. In order to successfully pull a good part from this mould I need to sand the surface smooth, and so I started doing that with some 120 grit sand paper:

Slowly getting smoother:
At this point I’d been sanding for a couple of hours and had developed a callus on my finger tip so I decided to stop for the day. However, by virtue of the way I made this mould there were a couple of unfortunate defects around the edge and on the flanges. These wouldn’t do very well under vacuum, so I decided to repair them. I used more UG1 tooling gel coat, mixed in some wax additive solution, and catalysed it. I then degassed it, and whilst that was happening I affixed a small piece of fluted signboard inside the mould and sealed it with wax so I could fix one of the issues. The other areas I sanded and cleaned, and then when I was ready I used a popsicle stick to apply it:


and that’s where I left off! Hoping to find some time in the next couple of weeks to finish the work and start pulling parts from it!